Category Archives: Learn from a Leader

Learn from a Leader: How engage your community for public art mural painting

At ioby, we are lucky to be surrounded by experts from across the country. Our ioby Leaders  can do some amazing things;  They can build bat houses, make beeswax candles, create public art through mural painting!  And best of all, they’re not stingy with their knowledge.  That’s why we like to  feature some of our favorite  Leaders in our Learn from a Leader series. We hope you enjoy!

karen golightly title public art mural painting

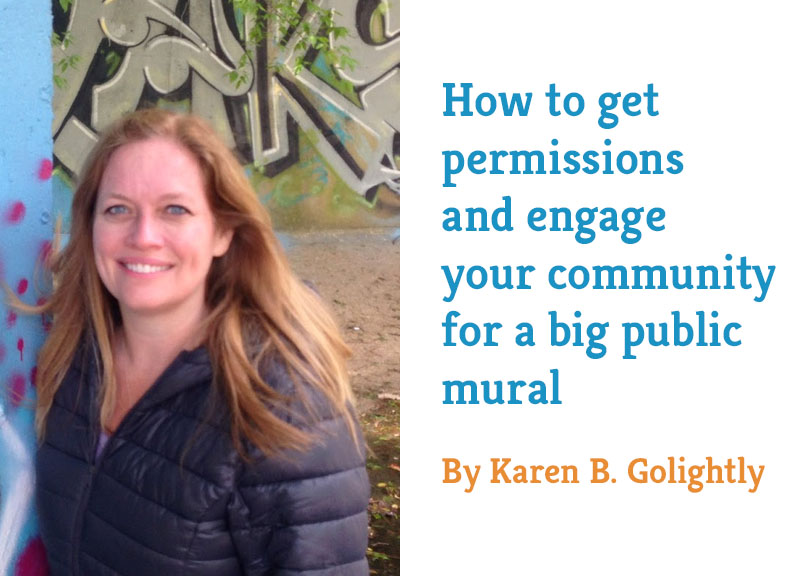
This week we hear from  Karen B. Golightly, a graffiti photographer and one of the three main organizers of the Paint Memphis mural painting project. Her photos and articles on graffiti and public art have been published nationally and internationally in literary and art journals, such as Triggerfish Critical Review and Number magazine.  Paint Memphis sponsors a one-day annual mural painting festival to create public art in unusual places. In 2015, they created Memphis’s largest collaborative mural, which was also its first city-sanctioned wall for public art.

  1. Get permission from the City—with some friends—for your mural painting project.

    This might be the hardest part! Memphis spent so many years trying to cover up graffiti that officials had a hard time understanding why they should now condone it; it literally took us years to reach agreement. We finally got there by doing a presentation to the Office of Engineering and Public Works showing how beautiful the public murals in St. Louis are, and how this is all about community—it’s not a threat! We also partnered with a local environmental nonprofit that wanted to use public art to beautify the floodwalls lining their recreational trails. It’s better not to go into this looking like one crazy person—get some backing!

  1. Figure out your budget.

    If you’re not familiar with calculating mural painting costs, ask someone who is. The other Paint Memphis organizers had a better idea than I about how much time and paint (both spray and bucket) we would need. We approached Home Depot, and they donated a lot of primer, paint, and volunteer labor (we shouted them out in our press release); paint brands Glidden and Behr and a local contractor also made donations. Our muralists also chipped in themselves by buying some of their own paint; about half of what we needed total. Remember that the bigger the public art, the more expensive it will be!

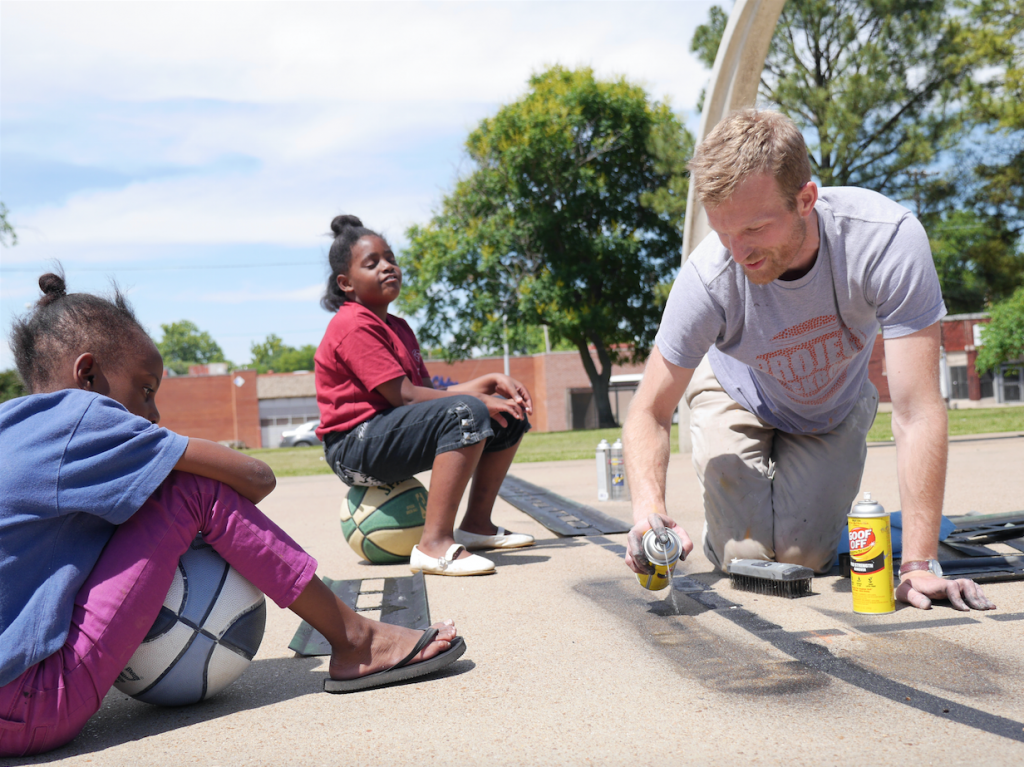
  1. Clean and prime for your mural.

    After appealing to the chief of our fire department for months, he understood that pressure washing was an essential part of the mural painting process, and agreed to help us. Once it was clean, Home Depot employees volunteered their own time to prime the wall.

  1. Get mural painting volunteers!

    We sent one press release, and had our ioby campaign and a website, but most of our buzz stemmed from the nature of the project: graffiti is cool! A lot of people spread the word through their own social networks and really showed up to help with prep and cleanup, press, professional photography—everything! We also had organizations reach out to see what they could do; one volunteered to clean along the wall after the mural painting.

  1. Choose your painters and prep for the day.

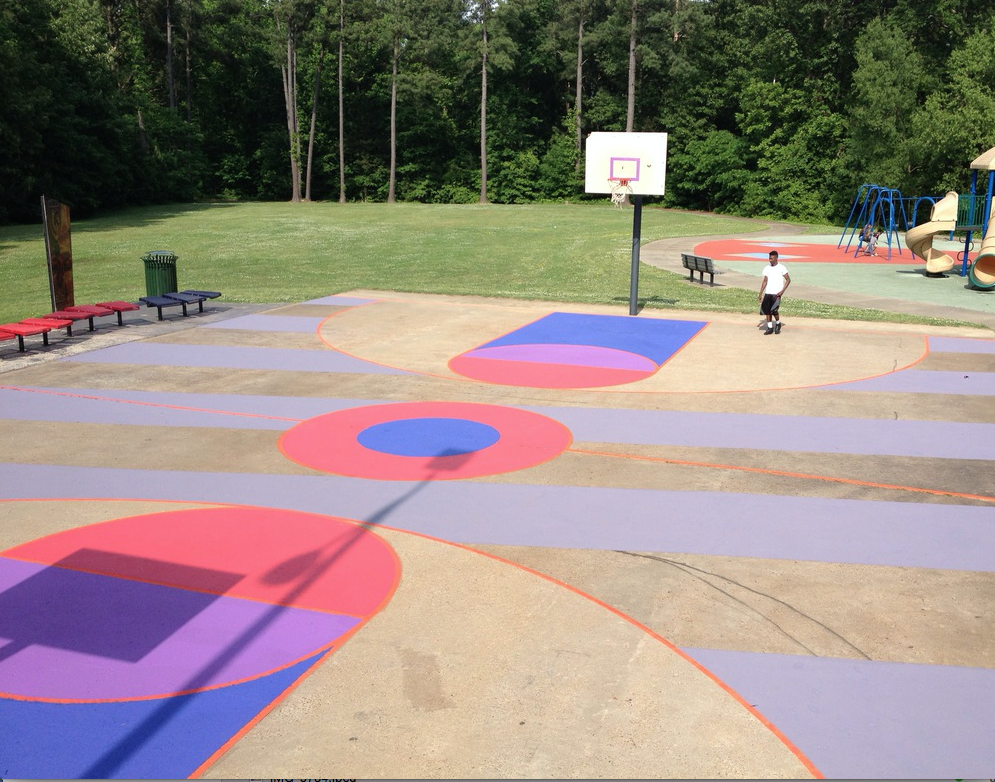
    We gave local and regional artists whose work was really good first dibs on painting, but artists from as far away as South Korea eventually heard about it and got involved. We organized the artists along the wall to alternate between solo muralists and crews; many developed their pieces to fit together, so we planned for them to work side by side. A local restaurant donated a barbeque lunch, and another sponsor donated water. All 70 artists were so grateful to come out and share their work.

paint memphis mural painting public art

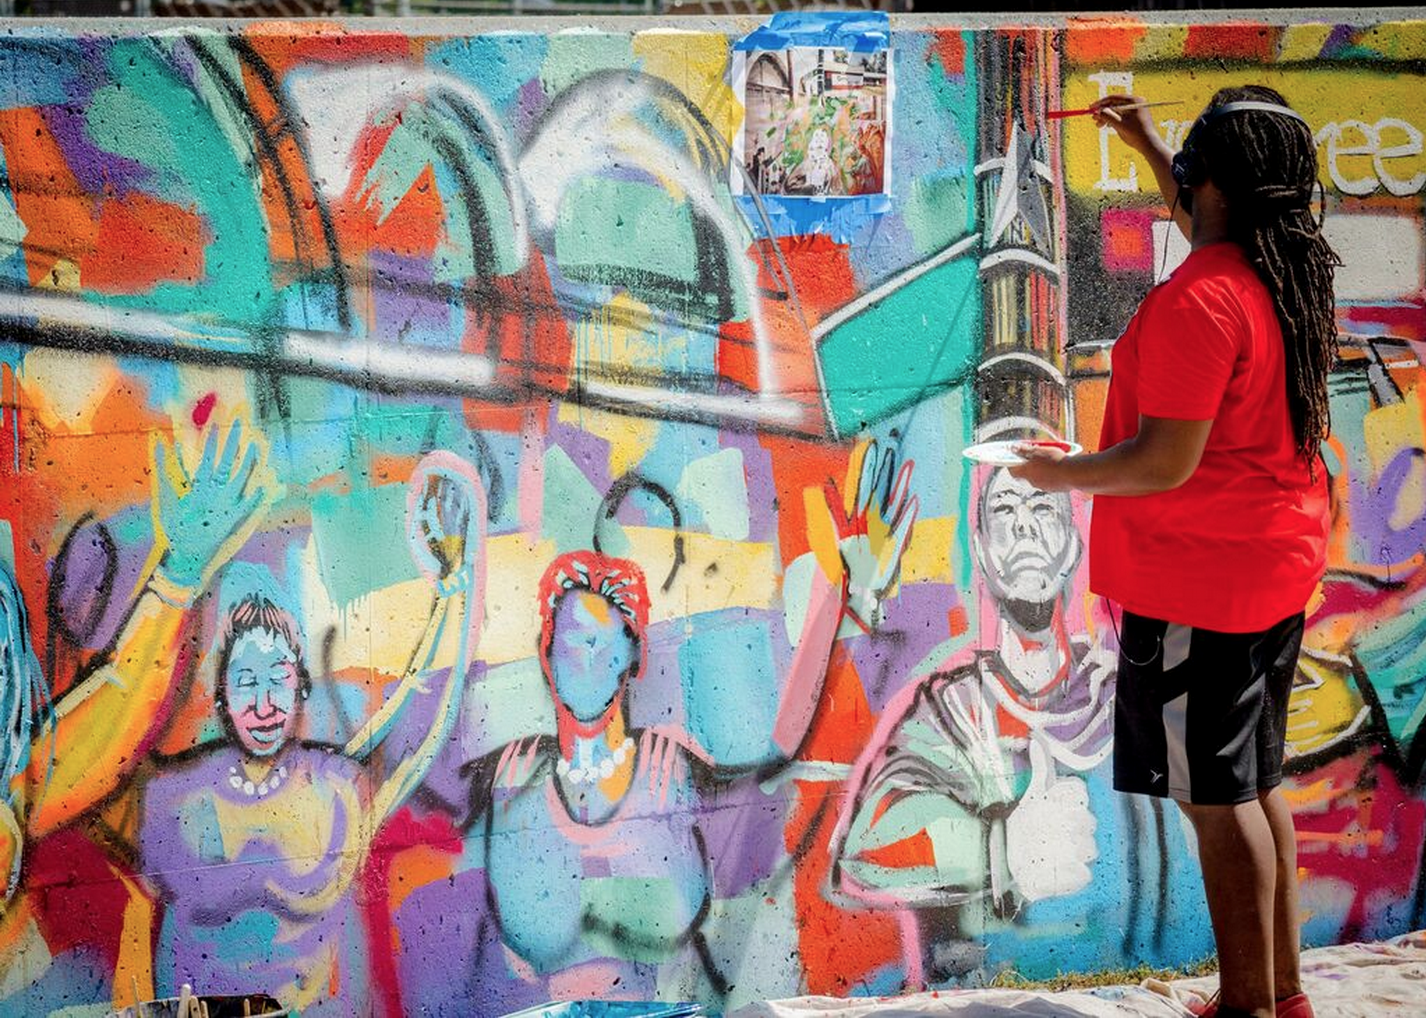
[Photo by Daryl Andrews. Lots more great ones on Paint Memphis’ Facebook page]


Time/timing:

If you’re in a hot climate, don’t do mural painting in the middle of the summer! After you get permission from the City, six months should be enough time to organize, provided you’re working with a committed team.


Mural Painting Budget:

We raised $2,500 and got a separate $500 donation, which was enough to buy half the spray paint; we needed an additional $2,000 for bucket paint and priming. So the materials total was about $8,000—but that was for a floodwall a third of a mile long and seven feet tall! We wanted it this size to make an eye-catching statement and a real public art movement for Memphis, but you don’t have to start so big.


Mural Painting Supplies:

In addition to all the usual paint and priming supplies—brushes, rollers, buckets, tarps, etc.—don’t forget to have tons of water and snacks on hand for everyone!

Screen Shot 2015-09-03 at 10.19.02 AM

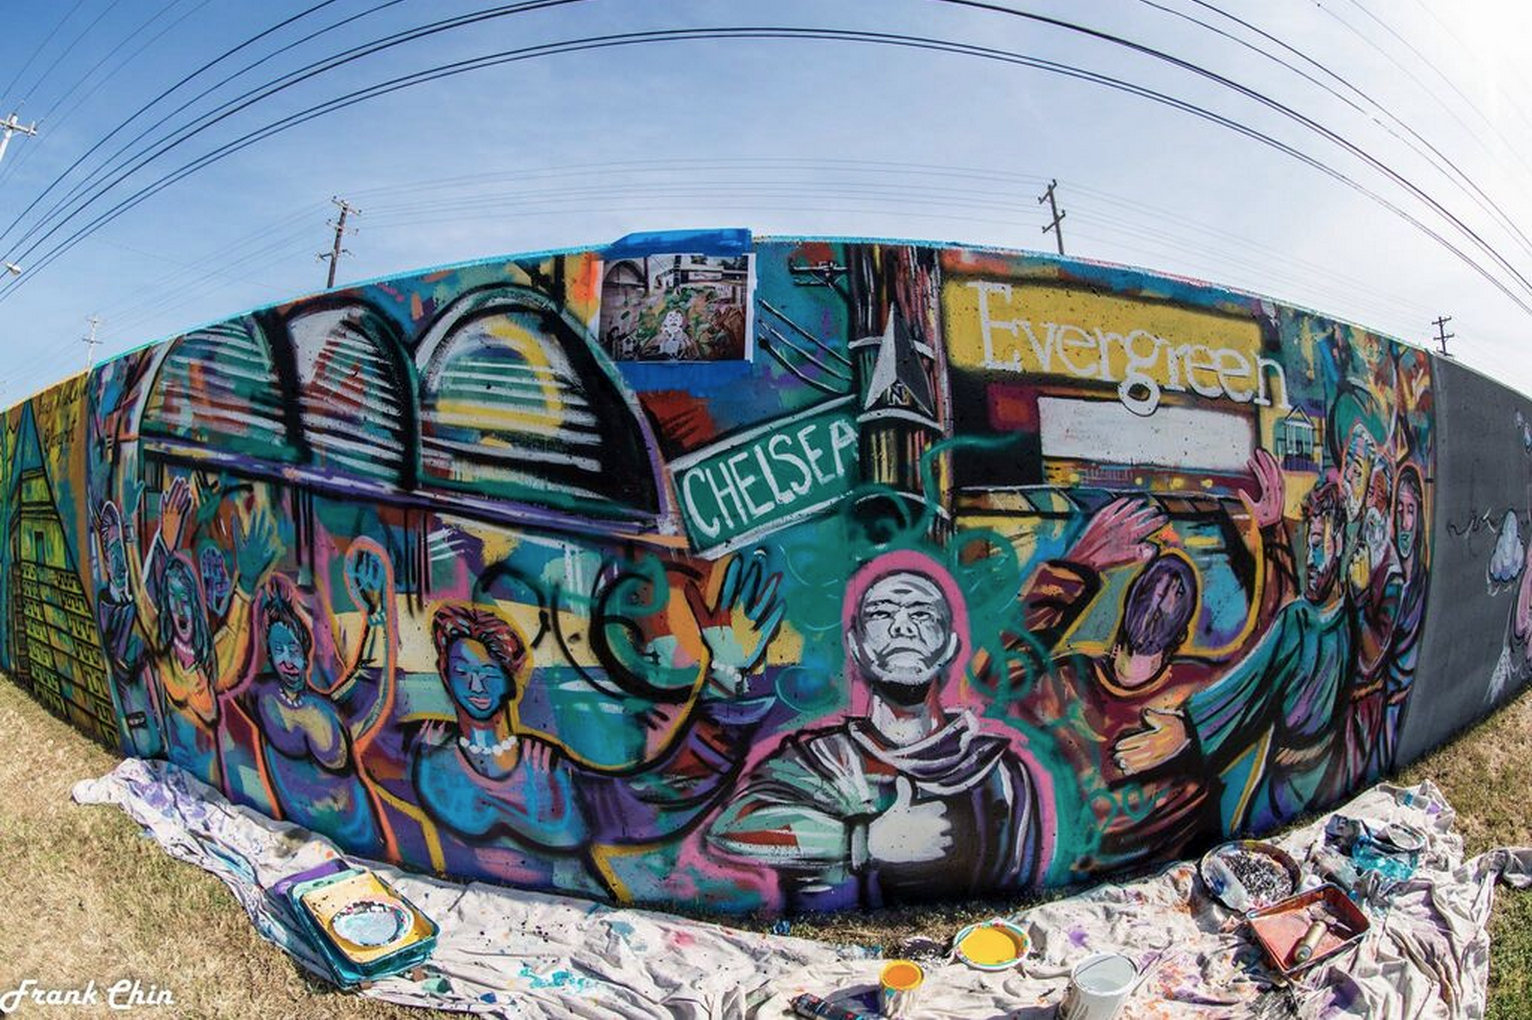
[Photo by Frank Chin. Lots more great ones on Paint Memphis’ Facebook page]


Additional public art resources:

Paint Louis gave us tons of great advice

Living Walls—a different approach in Atlanta

– Local arts agencies (like our UrbanArt Commission) are usually more than willing to help with securing funding and lending expertise

– Get a local nonprofit—one involved in the arts, environment, or something else related—to lend your cause validity and help make inroads to local government easier

– If there’s a person in charge of public art in your city’s administration, reach out to them (of course)!

-Get started fundraising for your own public art project: Tell ioby your idea!

Learn from a Leader: How to Build a Community Garden in a Public Housing Complex

Our Learn from a Leader series is our way to share the tremendous, varied expertise of our leaders with the whole ioby community. We hope you enjoy!

Mac Levine, MPH, is the founding executive director of Concrete Safaris, and hopes this article gets you to play and learn outdoors more often. When not teaching kids to turn public land into gardens, obstacle courses, and bike routes, Mac is stand-up paddleboarding in the Hudson River or hiking with her dog, Zipi.

mac_levine

Concrete Safaris’ Mad Fun Farm and Jefferson Gardens, founded with 7-to-12-year-olds in 2008 and 2013 respectively, are the first and largest kid-centered gardens on NYC Housing Authority property. Concrete Safaris teaches children from East Harlem how to research local food preferences, design and build gardens, spread wood chips, shovel topsoil, weed, and more, to help them become healthy leaders and environmental advocates.

The Steps

  1. Right questions, right people. Ask yourself: what is the need I’m trying to address? Is a community garden the right way to address it? Who are my primary stakeholders: kids, seniors, families, potential funders, the City (aka landlord), Parks Department? Can I commit at least 3-5 years to manage this project? Then ask yourself who else can help you, but don’t cast too wide a net—you’ll never get everybody! Find people in nearby buildings, a community center, or others you know who’ve already demonstrated an interest in gardening or helping their community. You don’t need a lot of people—just good people.
  1. Clarify expectations. Contact the government agencies you’ll need to work with early, and build their investment. Ask your garden partners how they envision the garden. Will it grow food, flowers, herbs? How big? What amenities? When will it be open and how will people access it? What will the land owner allow? Understand that needs and wants may change over time, but distill and communicate clear goals from the beginning.
  1. Plan the particulars. There are many moving parts to running a successful community garden. Think about how and where you’ll store your tools. Announce work days well in advance so people can plan for them. Will you seek nonprofit status to receive grants and donations and buy insurance? No matter what legal structure you put in place, how will you get organized—will there be a president, secretary, treasurer? How often will you meet? Set up a plan for regularly evaluating your progress, and receiving and incorporating feedback.
  1. Safety first. You will need garden-specific liability insurance; research and plan to buy it. People use tools and sharp objects all the time in gardens, so make sure all participants get the same safety orientation and follow the same rules. Sample rules include: always wearing gloves, making sure shoes are tied, not leaving nails on the ground, no running. Make sure everyone knows what to do   if an accident or altercation occurs.
  1. Program and promote. Ask your partners and stakeholders how they want to use the garden: do they want to hold workshops, put on performances, have barbeques? Do they want a Quiet Zone and a Social Zone? See what people want to do, then get the word out as often as you can, using social media, print materials, and your partners’ networks.

Concrete_safaris

Time/timing

This will depend on your motivation and expectations, but no matter how well-connected or committed you are, it will take time. Start planning a year in advance so you can be sure to meet all deadlines, get all permits, etc. (though remember you don’t need to accomplish all your dreams in the first year!). Keep in mind there might not be a protocol to follow if you’re the first in your area to do this. Develop a realistic timeline of when tasks will be completed, and by whom. No matter when you get all your green lights, plan to build and plant your garden by a specific deadline so that you have a motivating call to action.


Budget

It all depends on the space: what you can take care of, how many volunteers you’ll have, the size of the area, where you’ll source your materials, etc. Assess your resources and goals and create a budget based on what you have, need, and want to accomplish in your first year.


Supplies

This will also depend on your individual needs, but some suggestions are: lumber, corner brackets, screws, cordless drills, topsoil, compost, woodchips, transplants or seeds, trees, rakes, and wheelbarrows.


Additional resources

Concrete Safaris

The Green Thumb Gardener’s Handbook

The 4-H gardening curriculum

– Gardening programs in your city

– People in your neighborhood who know about gardening!

Learn from a Leader: How to renovate a neighborhood basketball court

Our Learn from a Leader series is our way to share the tremendous, varied expertise of our leaders with the whole ioby community. We hope you enjoy!

Daniel Peterson is founder and director of Project Backboard, a Memphis nonprofit that makes basketball courts safer, more inviting, and more fun in order to inspire and strengthen communities. “Having our town’s courts renovated when I was in high school really changed the trajectory of my life,” he says. “If you make even minor improvements that draw people out of their cars and off their bikes and out of the house and into the parks, then you start getting that social interaction that strengthens community ties.”


daniel_peterson_project_backboard

[photo by David Leonard]

Basketball is the most popular recreational sport in the United States across all ages and genders. The balance of individual contribution and potential for group excellence makes the game equally shareable with friends, family, neighbors, and strangers. Improving public court facilities invites people to both work on their skills and play games together, increases park usage and safety, and bolsters community.


steps

  1. Identify a court and get permission to paint it. If you’re thinking of a court in a public park, contact your town’s parks department. If you’d like to refurbish a court on church property, in a schoolyard, etc., get in touch with the management there. If you want to tackle painting any walls or stands that border the court as well, mention this too.
  1. Gather a team and decide on your design. One person can do this project solo, but it’ll be more fun and go faster if you get a few other friends or fans involved; three to five total teammates is a solid number. Then think about your design: Are you going for full or half court? Do you want to paint your keys? Will you stick with black and white, use a local team’s colors, or get fancy with graphics? Want to enlist a local artist to help with court design, or put a mural on the sidewall?
  1. Raise money! Use ioby! Repainting a court isn’t a super-pricey project (see budget below), so raising enough money shouldn’t be too tough, and ioby will help you every step of the way. Get started by filling out an idea form.
  1. Get supplies. Some of the supplies you’ll need are one-time use (like paint and tape), but you can definitely borrow others, like ladders, paint trays, and rollers. (Borrowing stuff is also great because it gets other people interested and invested in your project!) Dark and black paint will work better than light, but use professional grade no matter what. Concrete paint (for garage floors) is designed to withstand a lot of footprints, so use this for the bulk of the court. You can spray paint your keys and lines.
  1. Have a renovation party (and maybe a celebratory cookout afterward)! It’s good to have two or three people for the measuring phase, then three to five for painting (more hands than this can be useful, but everyone might not have a job to do at every moment). Once all the work is done, consider throwing or helping the property owner to organize a cookout to celebrate and inaugarate the new court. A party is another great way to engage your neighbors: ask a local grocer if they would consider donating hot dogs to the event; offer to put a sign up with their business name in exchange.


project_backboard

timing

Planning the design and colors you want for most courts will probably take an afternoon (or longer if you want to go all-out with graphics!). One person can paint a court in about eight hours; with a group, you’ll cut your time in half. If you prime the concrete, you’ll need to let it dry for at least two hours before painting; if you use multiple paint colors, you’ll need to add about one hour of dry time between each. Prime and paint in the morning, so you can be done and dry by the time school gets out! And pay attention to the season with regard to your paint: some concrete paints shouldn’t be used below 56℉.


budget

An average total cost for a refurbishment is around $430. If you don’t paint the keys a color, and just want to add the lines, you can reduce your costs to about $230. (But Daniel’s suggestion is to aim high!)


project_backboard_2

supplies

You will need the following to paint lines and color the keys and center circle:

  • 12 cans of spray paint ~ $65
  • 2 gallons of concrete primer ~ $40
  • 3 gallons of concrete paint in your choice of colors ~ $110
  • You may be able to borrow some painting supplies, but you will need 2 rollers for the primer and 2-3 for the paint ~ $20. If your court is concrete, you can use a 3/8 inch nap roller, but if you’re painting blacktop, you’ll want 1/2 inch. (If you borrow your paint trays, put a tray liner in each one—these cost about 90 cents each, versus $3.50 for the whole tray.) Add an additional $20-$30 if you can’t borrow any rollers or trays.
  • For the sidelines and baselines, you’ll need a three-pack of painter’s tape ~ $25
  • The court stencil will cost you $150 (there are cheaper ones, but buyer beware). Two good options: Ronan’s Easy Court and Dazadi. (Or, if you live in Memphis, you can borrow Daniel’s!)


additional resources

Project Backboard

– Cool court design ideas:

Viral Hoops

Pigalle and Nike

21 Amazing Courts Worldwide

– You can reach out to Daniel at dpeterson@projectbackboard.org with any questions—he’s super nice!

Learn from a Leader: How to create a pollinator sanctuary

Our Learn from a Leader series is our way to share the tremendous, varied expertise of our leaders with the ioby community as a whole. We hope you enjoy!

Pete Widin is a recent graduate of the Master of Landscape Architecture program at the University of Michigan, Ann Arbor. He is excited to continue supporting a transition to perennial-based agriculture and community development through the participatory design of gathering spaces and urban food oases. He currently resides in Portland, Oregon and works at Pistils Nursery as a Landscape Designer.

pete

The steps

Without the assistance of pollinators, many of the plants we rely on for food cannot produce fruits, vegetables, or seeds. Honeybees are well-known pollinators, but different kinds of butterflies, beetles, moths, ants, wasps, cicadas, aphids, and others insects also carry out this important duty. Earmarking part of your garden as a pollinator sanctuary—an area devoted to plants that support local pollinators—will encourage these helpers to keep helping us.

  1. Round up a reliable crew. If you want to build a sanctuary in a shared space like a community garden, get a core group of volunteers to work with you who are interested not just in designing and planting, but also in long-term stewardship. (It might surprise you how often a group starts a garden but then neglects it; weeds can quickly take over and undo all your work.) Reach out to your social networks or talk to people in community gardens near you to connect with good candidates.
  1. Location, location, location. Ideally, you’ll be able to choose a spot that’s highly visible but not highly trafficked to locate your sanctuary. A colorful pollinator strip alongside a fence or bordering a garden’s periphery can be a pretty as well as functional addition. Since you want bugs to be swarming around, the main purpose of this area will be conservation and education, not so much leisure!
  1. Design it right. When you’re designing your sanctuary, keep in mind that small is usually best to start. You’ll keep costs low and learn as you go. Create a specific plan: what plants will you plant, how many of them, where in the plot? What do you have to do to prepare the area: take off turf, rototill? Will you want any signs to relay information to visitors? Think through how you’ll implement your design, who on your team will do what, and when everything will happen. Take this time to make a plan for continued maintenance, too.
  1. Finance. Find out who owns or manages the land you’re working on and see how they might be able to help. Houses of worship, local universities, neighborhood associations, your municipal parks department, and natural resource agencies can be other good sources of support. When you present your plan, make sure you illustrate its many functions: education, plant propagation, point of interest… When you meet with potential funders, bring a sketch of your plans and/or photos of the garden space to show them what you’re thinking.
  1. Installation & inspiration. Have snacks for your crew on installation days!, and always ask everyone to introduce themselves at the beginning. Have fun and the process will go fast. As you get established, let nearby schools, churches, civic organizations, and other garden enthusiasts know. Invite them to check the sanctuary out, and think about what programming or events could be planned there.

pollinator_garden_web_235

[Courtesy Xerces Society]

Timing

Gather your team in the fall and meet a few times during the winter to plan. Planting plugs in the spring instead of seeds in the fall the first year is usually good—plugs flower earlier and have a stronger root system.

Budget

Pollinator sanctuaries are often less expensive to implement than edible gardens, because you don’t need raised beds. Budget around $5 per square foot for plants, then think about whether you’ll need to buy or rent tools, how many people you’ll need to have snacks for, etc. The 1,000-square foot sanctuary I helped build at a botanical garden cost about $2,000 total.

Supplies

Depending on the garden, you may need a sod cutter, sheets of painter’s plastic (to kill weeds over the winter), trowels, and rakes. When you buy your plugs, try to go to a native plant nursery that sells local genotype plants, ideally collected in the wild nearby. This will benefit your pollinators a lot.

Additional resources

The Xerces Society can help you find the right plants to attract pollinators in your region

– Your local university’s agriculture extension can help with this and other questions

– Ask neighborhood landscape designers and park employees if they’d be willing to chat about garden design or the native plants popular with your local pollinators

Want more? Find out from Sustainable Flatbush’s Sheryll Durrant how to make a healing herb garden!

Inspired? Start your own project!

Learn from a Leader: How to Build a Healing Herb Garden

At ioby, we are lucky to be surrounded by experts from across the country. Our ioby Leaders can do some amazing things; They can  build bat houses, make beeswax candles, teach  kids how to tell stories through dance! And best of all, they’re not stingy with their knowledge. That’s why we want to feature some of our favorite  Leaders in a new Learn from a Leader series. We hope you enjoy!

This week, we hear from  Sheryll Durrant, urban farmer, educator, master composter, and food justice advocate. She is the director of the urban farm and garden program for Sustainable Flatbush, a 2014 certificate student in Urban Agriculture at Farm School NYC, and a 2013 We Are All Brooklyn Fellow.

Sheryll

Herbs used to occupy a bigger place in our domestic lives—they were used in many home remedies as well as in recipes. Mass-produced medicines have largely displaced herbs as health aids in our society, but there are still many gentle, effective applications for these little green guys. You just have to know how to use them.


  1. Community Outreach. Start by thinking about who you can “tap into” for this project, and ask how they’d like to help—don’t just assign them a job. Local apothecary Sacred Vibes volunteered to help us decide which herbs to grow and provided education on their uses; a neighborhood carpenter wanted to help us build the raised beds, vertical garden, and containers; a reuse center was glad to donate the wood. Think of who your allies might be and approach them; see if they want to do something to help and what that is. You can’t just go into a neighborhood and build without asking!
  1. Design. All community gardens in NYC are required to build raised beds; check with your municipality. Get a soil testing kit. Decide if you want to invest in a cold frame to protect your seedlings, how you’ll contain and turn your compost, whether you want a pollinator garden for butterflies, etc. Take an inventory of your needs depending on what you want to plant, how much help you’ll have, and what your space looks like. Then use this info in the next step.
  1. Budget. Don’t just pull numbers out of a hat! Talk with all your partners about what they’ll be doing and what it will cost. Plug all the time, money, and skill requirements into a spreadsheet and see where your gaps are, then figure out how to fill them. ioby is a great resource for info about budgeting, as they have years of experience realistically planning for projects like these.
  1. Plan for people. Our herb garden is a gift to our community. For them to enjoy it as much as possible, they have to know its value and how to use it. We really thought about—and again, asked people about—what kinds of workshops would bring the most benefit to our very diverse neighborhood, and came up with a handful of ideas to start. They included one focused on herbs for women, one on kids’ medicine, one about depression, and one for the elderly and their caregivers. The workshops were well-attended, helped people understand our mission, and revived our community’s connection to their neighborhood.
  1. Promote! We didn’t have the money to print anything, but used social media in every possible way to promote our workshops. We asked all our partners to spread the word through their personal and organizational networks, and used sites like Meetup and Google Groups to reach even further. And remember to always keep your website up to date!


Time/timing:

Start your community outreach in the fall. Plan and design in the winter. Seed in March/April. Our garden took about six months from thinking about it to opening it. It was our goal to open on Earth Day!


Budget:

Ours was $3,000, though costs will vary per project. We got a lot of volunteer labor, but we did pay our carpenter. And we got a lot of materials donated (wood, mulch, plants), but we did buy others, like landscape cloth and our cold frame.

Supplies:

Your particular shopping list will depend on the needs of your specific garden, but a general list would include: non-treated lumber, ground cover, pallets, tools, food-grade cans for pots, rainwater barrels, mulch, organic soil, a work table, seeds, a compost bin, hinges, drawer pulls, and—my favorite—Liquid Nails!

Additional resources:

– More info on our Healing Herb Garden

– Another “Herban” Garden near us

– Reuse centers like Build It Green! in New York

– Your city’s Department of Sanitation (they donated our mulch)

– Volunteer organizations like New York Cares

– Local botanic gardens