Category Archives: Learn from a Leader

Learn from a Leader: Bring a Farmers Market to Your Community Garden!

Want to start your own project but need some inspiration? Our Learn from a Leader blog series is profiling past ioby Leaders who succeeded in bringing more fresh food, active transport, green spaces, and other healthy improvements to their neighborhoods. Read on, and imagine what you could do on your block!


About the project:

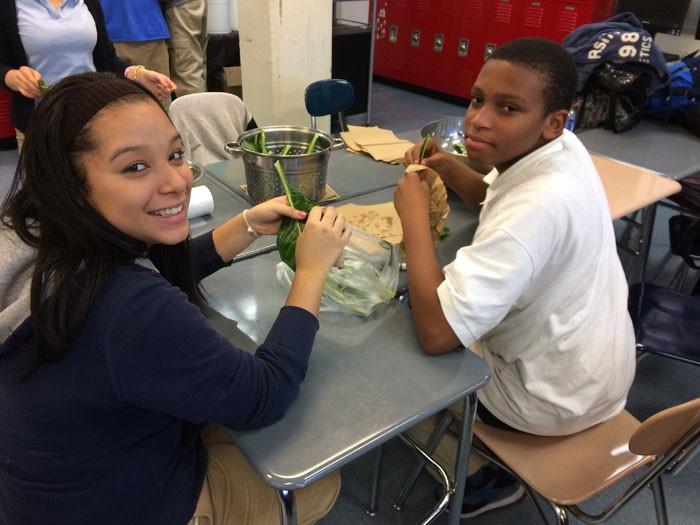
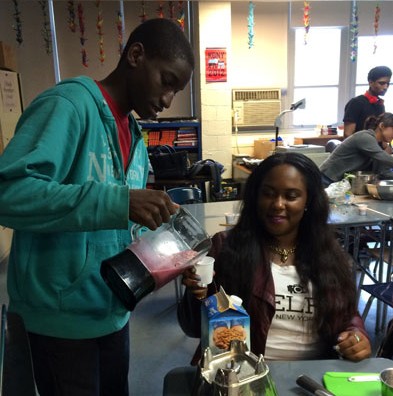
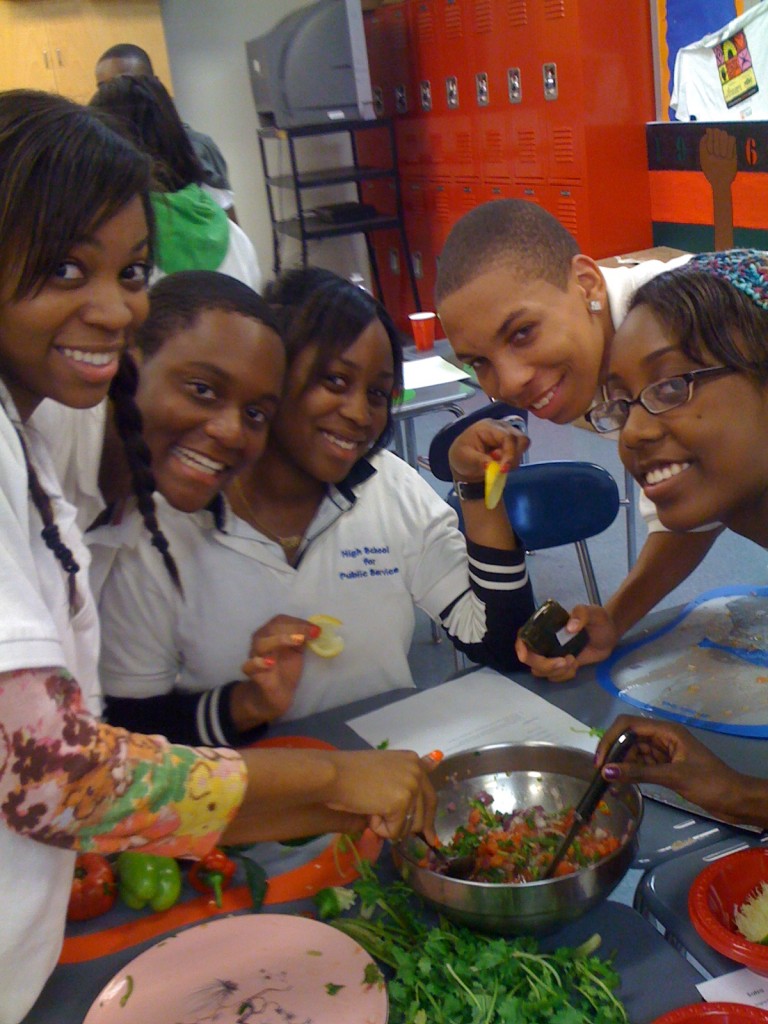
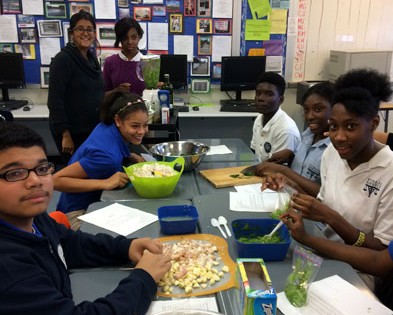
Chenchita’s Community Garden is a teaching community garden located in East Harlem, NYC. For well over a decade, its members have been growing delicious food and teaching their neighbors about urban farming, as well as hosting arts and crafts events, open mics, crocheting and knitting clubs, and more.

Last winter, the campaign to expand Chenchita’s Community Garden Farmer’s Market got underway. Their members used a combination of indoor seedlings they started themselves with flowers, herbs, and vegetables from GrowNYC’s Greenmarket Farmers Markets to offer affordable fresh food—with a side of horticultural education and locally-grown entertainment—to the surrounding community.

chencitas-2015-4


The steps:

  1. Determine your scope. What kind of market do you want to set up: just a farm stand with a few selections, or a full-on market? Do you want to sell only edibles, or also flowers and plants like groundcover? Is your intended audience people in a three-block radius, or would you like to bring in your whole neighborhood? How many garden members will be helping you organize the market (at Chenchita’s, we’ve had between three and five per season)? Answering these questions at the start will allow you plan your next moves.
  2. Start making connections. Unless your market will be teeny-tiny, you’ll probably need to get both farmers and volunteers on board to help stock and run it. Reach out to places like NYC Greenmarkets and Just Food to connect with farmers. The Youth Leadership Council can be a good place to find volunteers, as can NYCHA [New York City Housing Authority] resident associations—since NYCHA residents can earn community service hours for working in community gardens. This phase takes some researching and networking.
  3. Dig into the details—and look for discounts. We wanted to make sure our visitors could use EBT [Electronic Benefit Transfer: a card that allows shoppers to use food stamps to pay for purchases], so we had to get that set up. We wanted to make sure we had banners to advertise the market, and porta-potties for shoppers to use. We needed to make our water supply accessible to all our farmer-vendors, and ensure everyone had a tent and a table… The list goes on! Your farmers and any experienced volunteers can help you figure out everything you need. As you work your way through the list, remember to ask if you can get a nonprofit discount on any purchases—we got a free EBT setup and some money off our porta-potties because we specified that Chenchita’s is not a retail store.
  4. Offer extras for better attendance. We used our market as a chance to host cooking demos by Just Food and the NYC Department of Health. We gave composting workshops and gave away samples of herbs we grew. We offered puppet shows and “storytime” readings for kids and families. Not everyone will come around if you’re just throwing a farmers market—but they might if you advertise that some other fun things will be happening!
  5. Treat your people right. Since your volunteers will play a major role in your market’s success, don’t forget to show your gratitude. At Chenchita’s, we make sure to give our helpers a share of veggies as a thank-you gift, and we offer them other tokens whenever we can. People love useful items like plant pots and countertop compost cans—and things like that can also remind them of their community garden in the off-season!


Time/timing:

Farmers start setting up their market schedules for the coming summer in January, so get yourself organized in the fall so you can approach them before their plans are set. (Example: If you want to offer a farmers market in summer 2017, start organizing in fall 2016 so you can approach farmers during the winter and be ready to roll out by May or June.)


Budget:

This of course depends on the scope of your market (see step #1!), but many markets will need somewhere in the $5,000 range to get going.

Making a list of the things you need will help your budget come into focus. For example, a 10×10-foot tent could cost $400. If you want to become a member of the Farmers Market Federation of New York, that’s about $100. Printing a big vinyl banner could cost $150. Liability insurance could be $300…

When you’re budgeting, keep in mind that starting small and growing can be a great way to go. This allows you to learn from your mistakes before wasting too much time or money, and many farmers say they’d rather have a small market than a large one, since they get to know their customers better that way. Remember: Don’t judge your market by the quantity of its produce; judge it by the quality of interactions your visitors have with your farmers!


Additional resources:


About the author:

Angela Maull—known to many as “the Goddess of Chenchita’s Community Garden”—is a Harlem native who’s been growing food there for over 15 years. She is also a certified master composter, beekeeper, garden designer, Trees New York-certified Citizen Pruner, and a member of the NYC Community Garden Coalition and the greenNYCHA Garden & Greening Program—just to name a few.

Angela Maull Chenchitas Garden

Feeling inspired? Want to take action in YOUR neighborhood? If you have awesome ideas about how to make your town greener, safer, and more fun, let us help! Tell us your awesome idea right here. We’d love to help you get started today.


Learn from a Leader: Help Expectant Moms Access Affordable and Fun Fitness

Want to start your own project but need some inspiration? Our Learn from a Leader blog series is profiling past ioby Leaders who succeeded in bringing more fresh food, active transport, green spaces, and other healthy improvements to their neighborhoods. Read on, and imagine what you could do on your block!


about the project

Economic and geographic access to prenatal group fitness activities in New York City is far from equitable. For the past six years, the NYC Prenatal Fitness Initiative has been working to establish a model for community-based prenatal fitness programs for low-income women all around the city.

Co-founder Andrea Mata has been teaching water exercise for over a decade. “I love sharing the joy of water with people who aren’t necessarily Olympic swimmers,” she says. When she became pregnant with her first child, Andrea found out about prenatal water exercise and took a training class in it. “That’s when I started to notice how expensive prenatal fitness is here, and how few geographic regions it’s offered in,” she says. While she still teaches water exercise to non-pregnant people, Andrea’s also become committed to helping more women access myriad forms of prenatal fitness—like walking groups, yoga, and belly dance.

Prenatal fitness ioby

The steps:

  1. Verify the need. As a fitness instructor, I saw firsthand what was available for pregnant women in different areas—and what wasn’t. I would overhear my students at Riverbank State Park in Harlem talk about how they really wanted more of the kinds of classes I was teaching in our area, but there were so few to choose from. So I knew for sure we had a need.
  2. Start connecting. Identify and contact people and entities in your area who are likely to be thinking in a community way already: parks and other public spaces, city pools, yoga studios, community centers… I met a midwife who was eager to see more prenatal fitness options, too, and we started working together right away. Connect with as many of these “natural allies” as you can at the beginning, then sort out who can help you teach, promote, sponsor, fundraise, or otherwise take part.
  3. Success in numbers. Getting together the energy of even two or three excited people is powerful, and can help you win more support. For example, doctors and clinics have historically had some trepidation about recommending exercise like yoga to pregnant women out of concern for their safety. While that situation is changing, it can still work to your advantage to connect with a like-minded nurse or medical aid who can help promote your offering among their peers.
  4. Try, err, and try again. We experimented a lot with finding the right spaces, going into new neighborhoods, figuring out how to schedule a class, how to do outreach… Every change we made required consideration of new factors, like language access (hint: it’s great to have a bilingual person on your team if you can!). Just jump in, see what works, what’s sustainable, and keep refining your idea as you go.
  5. Stay flexible & persevere. Be prepared to shift your expectations when you need to. It’s almost a given that you’ll run into delays, low attendance, and fundraising snags at some point. Just push through, and figure out ways to keep the energy going until things shift and the right time comes. Don’t be afraid! You might be very surprised at whose attention you’ll get and who’ll offer to help—how all the pieces somehow come together. If you believe in your project and know it has value, persevere.


Time/timing:

This depends on how large in scope you’re trying to go: just one yoga studio? Three locations in your neighborhood? borough-wide? One important thing to keep in mind is that donors usually want to support things they think will last, so you should aim to secure dedicated spaces that can host classes year-round. But also remember that your team is working on this in their spare time—it took us about two years to get off the ground (though another group might only need six months). At all stages of the game, just try to be realistic about how long it will take you to get individual tasks done—especially promotion. It’s never too early to start advertising a class!


Budget:

We’ve always been very creative with our administrative costs: we send things out electronically instead of printing them, we work with spaces that don’t charge a rental fee… All the money we’ve raised has gone to support the instructors we hire: they all have tremendous gifts to share, but also need to pay their bills. We raise enough to pay them $50 per class.


Additional resources:

  • Shape Up NYC: This free drop-in fitness program offers aerobics, yoga, Pilates, Zumba, and more, and has locations across the five boroughs.
  • Healthy Start Brooklyn is a city-led program that provides education about pregnancy, childbirth, parenting, breastfeeding, and healthy living for families. They coordinate both prenatal and postpartum fitness classes.
  • The NYC Prenatal Fitness Initiative Facebook page. (It hasn’t been updated in a while, but shows a lot of what we’ve done.)


about the author:

Andrea Mata is a mother of two, a proud resident of Harlem/Washington Heights, and a dedicated community fitness enthusiast. She has been teaching prenatal water exercise for 13 years and co-founded the NYC Prenatal Fitness Initiative in 2010.

Andrea Mata ioby


Feeling inspired? Want to take action in YOUR neighborhood? If you have awesome ideas about how to make your town greener, safer, and more fun, let us help! Tell us your awesome idea right here. We’d love to help you get started today.


Learn from a Leader: Bring healthy cooking to the classroom!

Many factors contribute to our health, including genetic predispositions, access to quality medical treatment, and even the amount of sleep we get.

But have you ever thought about how your neighborhood affects your health?

“Social determinants of health” is the term for every external condition in which we are born, grow, work, and age. These include our relationships with family and friends, our employment opportunities and experiences, our socioeconomic status, and—of particular interest to ioby—our neighborhood amenities, like public transit, affordable fresh food, exercise options, and nutrition education. People who live in zip codes that have these things are likely to enjoy good health; in areas without them, residents are likely to struggle with with chronic illnesses like obesity and diabetes.

The good news about these social determinants of health is that we have the power to change them! Every day, citizen leaders are taking small steps toward big change by making their neighborhoods healthier, one block at a time. And this summer, ioby is partnering with the New York State Health Foundation to help local leaders in nine areas throughout the state get their ideas for healthy change off the ground by providing fundraising training and dollar-for-dollar matching funds! Read more about the Healthy Neighborhoods Challenge and how to apply.

Want to get involved but need some inspiration? Our Healthy Neighborhoods Challenge Learn from a Leader blog series is profiling past ioby Leaders whose projects exemplify what we’re looking for from applicants: projects that focus on healthy food, active transport, green spaces, fighting disease, or some combination. Read on, and imagine how your neighborhood could benefit!


High-School-For-Public-Service-Students-and-collard-greens (1)


About the project:

Residents of neighborhoods that lack fresh produce develop diet-related diseases more frequently than people who have access to fresh food. For some families, the most convenient—and affordable—meals come from fast food restaurants and bodegas, making alternatives seem out of reach. But teaching young people how to source and cook healthy food early in life can set them on a path to break that mold.

“Our health is in our own hands. We have the knowledge,” says Stacey Murphy, Director of BK Farmyards and leader of the project Cooking the New $1 Menu: Straight from the Farm, which brought nutrition education and healthy cooking classes to high school students in Brooklyn. “Our approach was ‘health and nutrition for bodies, community, and planet,’ ” she says. “We wanted to get the kids tasting and trying new things to get them invested. Once people embody something, they start living it.”


Brooklyn-Youth-Smoothies-Nutrition


The steps:

  1. Take stock & team up. It’s a big process to bring cooking into a classroom that hasn’t done it before. Whether you’re a parent, teacher, or neighborhood volunteer, assess your school’s resources and generate a team—that includes students. Think through the logistics: What can you prep, cook, eat, and clean up in an hour? Is there a student with a free period who can help you before or after the class? Where can you store your kitchen equipment when you’re not using it? Plan a routine, and revise it as you go.
  2. Crowdsource your curriculum goals. Engage students in asking what kind of health lessons they want to learn, then devise your recipes from there. Are they saying: “I’ve never used a knife” or “I’ve never measured anything”? Do they want to know if there’s any such thing as “healthy chocolate”? Are they asking what people mean by “Fair Trade”? Spend your first class determining what they want to know, then design a realistic, age-appropriate curriculum that aims to address their questions.
  3. The right tools for the job. If you bring knives into a high school, the very first thing you have to do is teach students how to use them—and explain that any unsafe use will mean no participation. Make the lessons more useful by trying to replicate what students are likely to have at home: keep it simple. And use recipes that provide something for everyone to do: one person can measure, another can chop, another can stir, all at the same time. This will illustrate that many pieces have to come together to make a meal, and keep everyone engaged.
  4. Start small. Don’t make a whole meal your first time; start with something simple, like salsa. No cooking required, and it’s easy to put together and taste immediately, but students can learn how to use a knife properly (and how the term “season to taste” can create a variety of outcomes from the same recipe). Learning basic techniques at the start, like cutting, will free up time later to make more complex foods.
  5. Make good habits. It’s important that students have time to taste the food, talk about why they like or don’t like it, and clean up in each class—those are all healthy habits for life! So make it a point to clean up before eating, emphasize food-related vocabulary, and show students how they can (and must) work as a team to make their meals a success.


BK Farmyards in school


Time/timing:

Every school is different, but you’ll always need time to take inventory of its cooking spaces and equipment; to learn students’ comfort levels around things like knives and measuring; for permission slips to be sent home and come back; to find out about any allergies and avoid those ingredients; etc. It will take a good couple of months at least to get everyone on the same page.


Budget:

This varies so widely! To get an idea…

– Set your curriculum first, so you know what equipment you’ll need. We went with metal utensils and ceramic plates, but paper and plastic might be a better choice for you.

– You probably won’t need a knife and cutting board for each student; maybe one per four or five.

– Some schools will go all out to provide you with materials; others can’t or won’t. Consider bringing in your own tools from home, or borrowing them, to save costs.

– Remember to think about keeping all students engaged during the lesson—a shortage of tools is boredom in the making.


High-School-for-Public-Service-Youth-Nutrition-Lesson

Additional resources:

The Food Project Toolbox’s books, manuals, and activities are a great place to start—especially their French Fries and the Food System: A Year Round Curriculum Connecting Youth with Farming and Food.

The Youth Farm, one of NYC’s largest urban farm sites, provides training opportunities to youth and adults, and increases local options for fresh, affordable produce.

The Nourish Curriculum Guide offers a rich set of resources to open a meaningful conversation about food and sustainability.

– Instead of fishing for a complete curriculum, try searching for individual recipes and create your own program. Also think about age-appropriateness: there might be good lessons for teens in a recipe written for kindergarteners. You can adapt it!
Stacey Murphy


About the author:

Stacey Murphy has taught hundreds of teens and adults how to grow, harvest, and prepare fresh foods. She is a recovering engineer and architect turned garden geek and farm nerd. Stacey founded BK Farmyards, a cooperative of urban farmers in Brooklyn dedicated to social justice through urban agriculture, and helped create over an acre of new farmyards in Brooklyn. She’s been featured on Martha Stewart Radio, PBS online, and once appeared on the David Letterman show with a giant radish. She envisions a world where everyone is nourished by the magic of fresh, affordable, and culturally-exciting food… extra points if it’s homegrown. Sign up for online classes and events at FarmyardBootcamp.com.


Feeling fired up about cooking in the classroom, or another project that could make your neighborhood healthier? Learn more about the Healthy Neighborhoods Challenge and apply for fundraising training and matching dollars now!

Learn from a Leader: Help peds walk safely with crosswalk flags!

Many factors contribute to our health, including genetic predispositions, access to quality medical treatment, and even the amount of sleep we get.

But have you ever thought about how your neighborhood affects your health?

“Social determinants of health” is the term for every external condition in which we are born, grow, work, and age. These include our relationships with family and friends, our employment opportunities, our socioeconomic status, and—of particular interest to ioby—our neighborhood amenities, like public transit, affordable fresh food, exercise options, and nutrition education. People who live in zip codes that have these things are likely to enjoy good health; in areas without them, residents are likely to struggle with with chronic illnesses like obesity and diabetes.

The good news about these neighborhood-based social determinants of health is that we have the power to change them! Every day, citizen leaders (like you!) are taking small steps toward big change by making their neighborhoods healthier, one block at a time. And this summer, ioby is partnering with the New York State Health Foundation to help local leaders in nine regions get their ideas for healthy change off the ground by providing fundraising training and dollar-for-dollar matching funds! Read more about the Healthy Neighborhoods Challenge and how to apply.

Want to get involved but need some inspiration? Our Healthy Neighborhoods Challenge Learn from a Leader blog series is profiling past ioby Leaders whose projects exemplify what we’re looking for from applicants: projects that focus on healthy food, active transport, green spaces, fighting disease, or some combination. Read on, and imagine how your neighborhood could benefit!

Screen Shot 2016-06-22 at 5.16.49 PM

About the project:

Crosswalk flags are sweeping the nation! Pick up a brightly-colored, reusable flag before you cross a busy street, look both ways, then deposit it on the other side for the next pedestrian. The flag will increase your visibility in the moment, and raise general awareness that peds are around—and have the right of way.

Sarah Newstok, who installed crosswalk flags in her neighborhood, says, “Memphis has high rates of pedestrian injuries and fatalities. Disregard for pedestrian safety leaves our most vulnerable populations at risk: children, the elderly, people with disabilities, transit users, and low-income neighbors without access to cars. The flags are not a perfect solution, but I do think they help. We did get a crosswalk and a crosswalk sign at our intersection after installing the flags, so that’s progress!”


Screen Shot 2016-06-22 at 5.16.39 PM

The steps:

  1. Picture it. Locate the intersections in your neighborhood that could benefit most from crosswalk flags. Busy places where there is a crosswalk already but no traffic light or stop sign are usually good candidates. In our case, we started with the intersection that’s the main entrance for Overton Park and the Memphis Zoo—it was crazy that it was so hard to cross there, as so many pedestrians use it!
  2. Picture it 2. Now locate some cute kids—I used my own cute children, of course—and take pictures of them looking sad because they can’t cross the street, then looking happy while using the flags to cross more safely. You can use these images to help explain and publicize your project.  
  3. Reach out. I was able to raise all the money I needed in a day or two by pinging people on Facebook who I knew were frustrated with the same situation. “Hey fellow PTA mom—how do you like not being able to cross the street to reach the park?” Appeal to people first who you know have had the same problem. Then, as soon as they donate, shout them out on social media and ask, “Who’s next?” Keeping that process up is pretty easy, and it works!
  4. Design. Go out to the sites and figure out what you need. Each intersection is different, but you will always need to set your flags up with: 1) A narrow plastic bucket (to discourage people from throwing trash in it) with a hole in the bottom (to let rainwater drain); a wide PVC pipe with a cap on the end works well (just drill a hole in the cap!). 2) Something to affix the bucket to a nearby pole (clamps work for thin poles like stop signs; zip ties are better for thicker ones like telephone poles). 3) Some kind of signage to explain the deal. (Laminated paper doesn’t last long, but you can get a sturdier sign fabricated, or just write in permanent marker on the bucket. Whatever you do, make the instructions clear: “Grab flag, look, walk, wave, deposit on the other side.”)
  5. Place your order. Search online for “buy safety flags” and a bunch of results will come up. Try to get flags that match your city’s pedestrian signs for consistency: most are orange or bright yellow. Affix your buckets to the nearest pole to the crosswalk on both sides, so people are sure to see them.


Screen Shot 2016-06-22 at 5.16.59 PM


Time/timing:

This is a quick project to start up—you could do it in a month—but the maintenance is ongoing. I still monitor the flags and replace them when they get faded (more common) or stolen (less common).


Screen Shot 2016-06-22 at 5.16.11 PM

Budget:

– Flags (approx $2.50 per)

– Buckets (approx $10 per) (make sure they’re tall enough so the flags don’t fall out!)

– Markers to write on buckets or sturdier signage: $1 – $50 (depending on fanciness)

– Small metal clamps or zip ties (approx $1 per)

– UV protectant spray (approx $10 per bottle) (to keep flag fabric from fading)

Total cost of one bucket with five flags = approx $40 – $50 ($80 – $100 per crosswalk)


Screen Shot 2016-06-22 at 5.16.25 PM

Additional resources:

I did not come up with this idea—lots of cities around the country are doing it! Just search online for “crosswalk flags” and see what they’re up to; systems keep improving. I particularly liked reading about Kirkland, Oregon’s PedFlags.
Screen Shot 2016-06-22 at 10.08.16 AM

About the author:

Sarah Newstok lives in Overton Park with her husband, three kids, and dog named Cleo. She is in charge of Special Projects at Livable Memphis, and enjoys bike riding, spending time in nature, and adventurous travel.

Feeling fired up about crosswalk flags, or another project that could make your neighborhood healthier? Learn more about the Healthy Neighborhoods Challenge and apply for fundraising training and matching dollars now!

Learn From A Leader: Encourage healthful walking with helpful signage


Many factors contribute to our health, including genetic predispositions, access to quality medical treatment, and even the amount of sleep we get.

But have you ever thought about how your neighborhood affects your health?

“Social determinants of health” is the term for every external condition in which we are born, grow, work, and age. These include our relationships with family and friends, our employment opportunities, our socioeconomic status, and—of particular interest to ioby—our neighborhood amenities, like public transit, affordable fresh food, exercise options, and nutrition education. People who live in zip codes that have these things are likely to enjoy good health; in areas without them, residents are likely to struggle with with chronic illnesses like obesity and diabetes.

The good news about these neighborhood-based social determinants of health is that we have the power to change them! Every day, citizen leaders (like you!) are taking small steps toward big change by making their neighborhoods healthier, one block at a time. And this summer, ioby is partnering with the New York State Health Foundation to help local leaders in nine regions get their ideas for healthy change off the ground by providing fundraising training and dollar-for-dollar matching funds! Read more about the Healthy Neighborhoods Challenge and how to apply.

Want to get involved but need some inspiration? Our Healthy Neighborhoods Challenge Learn from a Leader blog series is profiling past ioby Leaders whose projects exemplify what we’re looking for from applicants: projects that focus on healthy food, active transport, green spaces, fighting disease, or some combination. Read on, and imagine how your neighborhood could benefit!


colleen_corcoran


About the project:

Walk This Way, Caminale is a series of street signs on historic Central Avenue in Los Angeles, developed by local students from Jefferson High School, that tell pedestrians how long it takes to walk or bike from where they are to nearby amenities, landmarks, and neighborhoods. The signs aim to get people walking and biking for longer distances than they thought they could, and to change the perception that Los Angeles is impractical to navigate without a car.

“This part of South Central has a much higher rate of obesity than other parts of L.A.,” says Colleen Corcoran of Los Angeles Walks, who led the project. “There’s a lack of healthy food, recreation opportunities… A lot of residents already walk or bike out of necessity, but we wanted the signs to encourage them to go for longer distances, and with health and recreation in mind, rather than just getting to work or running errands. The area was also a prime location for a project like this because we found a lot of community interest there, but not necessarily the local funding for people to do it on their own.”
Central Ave installed

The steps:

  1. Don’t go it alone. Identify some community partners. We wouldn’t have succeeded if we hadn’t worked with the National Health Foundation (NHF) and their Health Academy students at Jefferson High, as well as the City Council Office, and numerous other community organizations in the area. Approach organizations who work in your target neighborhood and know it well.
  2. Survey says… Ask people walking on the street questions like why they’re walking, where they’re going, if they would like to see walking and biking times posted, etc. These will help reveal the most popular destinations in your neighborhood and inform what should go on your signage. (A little later in this process, you can survey people again—to ask them what they think of your sign designs.)
  3. Design-a-Sign. Involve your community partners (and a professional designer, if you choose) in deciding what destinations to include on your signs, and the language and symbols to describe them. Get outside and do a “community asset walk” together to identify a well-rounded collection of places: parks, historic sites, city offices and community spaces, farmers markets, adjacent neighborhoods, etc. (We didn’t shout out specific businesses, but did say things like, “Healthy tacos: 15 minute walk.”) Then talk about your color palette, font styles, and icons (what symbol should represent a green space? a historic site?). You can tailor these choices to your area—in our case, we thought about how to represent South Central’s rich jazz history in our signs’ design.
  4. Locate & fabricate. We worked with L.A.’s Department of Transportation (DOT) to identify the best locations for our signs. It’s important to get expert help with this so your signs don’t wind up interfering with existing city signage, traffic lights, or other infrastructure. DOT can also advise you about how best to install the signs for maximum longevity. Then, we worked with a vendor recommended to us by DOT to fabricate our signs.
  5. Install & enjoy! Our sign vendor helped our students to install the signs, which can be a great hands-on learning experience. And NHF organized a post-installation community walk to show the signs off; students were invited to present to attendees about their role in the project.


Installation

Time/timing:

The work of surveying, designing, fabricating, and installing took us a few months. Depending on the size of your city and the number of partners you work with, the outreach piece can take longer, since there’s a lot of back-and-forth communication. Altogether, maybe six months.


Screen Shot 2016-06-20 at 4.46.54 PM

Budget:

We raised about $8,000 through our ioby campaign and spent about $7,000. Paying for professional design and fabrication help accounted for roughly half the total; most of the rest went to outreach activities like organizing events, making copies, buying materials for design sessions, getting maps, printing surveys, etc. Budget a few hundred dollars for each event, and a thousand or more to hire a professional designer. In general, we got a lot of volunteer help; your costs might be higher if you have to pay for more things out of pocket.

Screen Shot 2016-06-20 at 4.47.07 PM

Additional resources:

– Walk This Way, Caminale was based on the Walk Your City signage in Raleigh, North Carolina. Their Sign Builder lets anyone design signs for their neighborhood!

– Their founder, Matt Tomasulo, had a lot of good advice for us about where to put our signs and what they should say.


Colleen Corcoran

About the author:

Colleen Corcoran is a graphic designer from Texas, living and working in Los Angeles on projects that examine the use of design as a tool for education and positive change within the urban environment. She works with various community organizations and public agencies on projects that promote active transportation, human-centric public policies, and economic and social justice. Colleen is a co-founder of LA’s regular open streets event CicLAvia and currently serves on the steering committee of the pedestrian advocacy organization Los Angeles Walks. She can also be found along the banks of the Arroyo Seco or the window seat of the Metro bus.

Feeling fired up about time-to-walk signage, or another project that could make your neighborhood healthier? Learn more about the Healthy Neighborhoods Challenge and apply for fundraising training and matching dollars now!

Small fundraising is big: raise money for 10 small projects with a big impact!

Here’s something we hear all the time: we need to raise money on a big scale to make big change.  In community work,  it’s easy to get intimidated by the size of  the problems we want to solve. Because of this, attaching a huge number to that solution can make us lose momentum and decide not to try after all.

Well, the great news is that you don’t need to raise a lot money to make a tremendous positive impact on your community. In fact, some of our very favorite ioby projects are small fundraising projects, with budgets right around $500—or less!

(Bonus: if your ioby project raises less than $1,000, we waive our $35 platform fee. More info on fees is here.)

Here are ten ways to make a big impact on your neighborhood with small fundraising. Which ones would work in your community?

small fundraising raise money crosswalk flags

1. Safer street crossing, now in full color

Category: Safer streets, Tactical urbanism

Example: Crosswalk Flags, Memphis, TN

Small fundraising budget: $543

Here’s an easy thing to raise money for: Safer streets! Grab a brightly-colored flag from the bucket and look both ways. Then, hold it high to increase your visibility to drivers, then leave it in the bucket on the other side. Because of this project, not only did this Memphis street crossing become immediately safer, the project also drew the City’s attention to a place where a permanent crosswalk would be very welcome.

small fundraising raise money Marta Army

2. No more wondering, “When’s the next bus?”

Category: Safer streets, Tactical urbanism

Example: TimelyTrip, Atlanta, GA

Small fundraising budget: $534

Binh Dam raised money for bus stops in Atlanta to provide provide basic information for riders: routes, destinations, and timetables! Because these were missing, the project set out to identify the city’s most highly foot-trafficked bus stops. Then Binh attached printed timetables in weatherproof cases to the sign posts. Taking the bus just got a whole lot saner!

small fundraising raise money little free library

3. Little Free Libraries

Category: Placemaking, Sharing, Tactical urbanism

Example: Summer Meadows Little Free Library, Memphis, TN

Small fundraising budget: $362

Raise money for more books in more places, especially in neighborhoods without easy access to a public library. “Little free libraries” offer passersby of all ages the chance to pick up a great read, donate their favorite already-read books, and create a sense of community openness and sharing.

small fundraising raise money community garden memphis

[Via Carnes Gardens Facebook page]

4. Securing the tools to keep community gardens green

Category: Environment, Neighbors working together

Example: We want to buy James a Lawnmower, Memphis, TN

Small fundraising budget: $559

James Alsobrook lives next door to Carnes Garden, a new community and teaching garden created in a former vacant lot. He quickly became one of its most devoted and beloved caretakers. And so when James lost access to the lawnmower he had been borrowing to cut the garden’s grass, his neighbors decided to raise money on ioby to buy him a new (and better) one. Because of this campaign, James has the tools he needs to keep Carnes Garden a welcoming and safe space for all residents of the community.

small fundraising raise money urban chickens

5. A better home for urban birds

Category: Environment, Food

Example: Chicken Yard, Brooklyn, NY

Small fundraising budget: $273

How about raising money for the birds? A 100-member community garden in Brooklyn relies on their flock of five hens to educate visitors about caring for animals and growing food ethically and sustainably. And so, this small fundraiser provided the materials to expand the birds’ yard, giving them and their visitors a larger and cleaner space to eat, play, and socialize in.

small fundraising raise money lawn games

6. Pop-up neighborhood lawn games

Category: Placemaking, Tactical urbanism

Example: Barksdale-Auburndale Mobile Bocce Club, Memphis, TN

Small fundraising budget: $618

Just want to raise money to bring the fun? Try something like this easy set-up/easy tear-down mobile bocce ball court! It creates an informal, inviting game and play space for all ages, wherever it goes: parkside events, block parties, even long driveways.

small fundraising raise money block party

7. Getting-to-know-you community cookout

Category: Placemaking, Food

Example: Poplar Park Neighborhood Cookout, Memphis, TN

Small fundraising budget: $528

Raise money for a simple community cookout that can inexpensively set the stage to get your neighbors chatting and relating. Nothing brings people together like the combination of food, drinks, music, games, and space! As these project leaders said, a neighborhood cookout can encourage “strangers to meet and become acquaintances, and acquaintances to take steps towards becoming friends.”

small fundraising raise money solar lights

8. Shed some solar-powered light

Category: Schools, Environment

Example: Solar Lights for MSSA, Memphis, TN

Small fundraising budget: $515

A first-year school with a STEAM curriculum raised money to brighten up the front of their building—both for increased safety and nicer aesthetics. So solar-powered flood lights were an inexpensive and green option. Parents and students volunteered to install them on an already-scheduled school clean-up day. Bright idea, right?

small fundraising raise money wind energy

9. Green energy R&D in school

Category: Schools, Environment, Citizen science

Example: Wind Energy Power!, San Francisco, CA

Small fundraising budget: $500

Students in this high school’s “Green Academy” program were already learning about wind energy in class. So this project took it to the next level by raising money to provide them with supplies to make and test their own windmills. Their designs will be studied by future classes, help to prepare them for careers in engineering, and maybe even lead to the development of a wind energy system on campus.

small fundraising raise money environmental education

10. Environmental advocacy for students, by students

Category: Schools, Environment

Example: Banish the Bead!, Muskegon, MI

Small fundraising budget: $572

A group of junior high schoolers raised money to write and self-publish a children’s book about the negative impacts of microbead pollution in the Great Lakes. It’s called Billy the Bluegill and the Microbead Mishap, and they’re distributing it free to all 81 third grade classrooms in their county. The students believe that if they educate kids about how their consumer choices make a difference for the environment, parents will also get the message.

See? It’s amazing what you can do for a small fundraising budget of around $500—or less! If reading about these projects gave you a great idea to raise money for improving your neighborhood, tell us about it at ioby.org/idea. So, whether your project will cost $500 or a lot more, ioby is here to help you raise the resources you need to make it happen.

idea button raise money

Learn from a Leader: How to outfit women in need with essential monthly products


At ioby, we are lucky to be surrounded by experts from across the country. Our ioby Leaders can do some amazing things: They can build bat houses, transform vacant lots into gardens, teach kids how to tell stories through dance! And best of all, they’re not stingy with their knowledge. That’s why we like to feature some of our favorite Leaders in our Learn from a Leader series. We hope you enjoy!


About the project:

Sister Supply provides purchased and donated pads, tampons, and underwear to women who are homeless and/or living in poverty through Memphis-area women’s shelters and help centers. Effective menstrual products are costly and therefore out of reach to many women and teenage girls in Memphis. Without access to these essential items, finding and maintaining employment and/or staying enrolled in school can be challenging.

Nikii_sistersupply_quote


The steps:

1. Get specific. Make your focus as specific as possible and write a short statement about it (you can also think of this as your mission). Sister Supply’s is: “We provide tampons, pads, and underwear to women in need.” Oral hygiene supplies? No. Incontinence supplies? No. Menstrual cups, Thinx, and washable pads? Maybe later, but not now. The more specific your focus, the more people will be able to relate to your message and the easier it will be to talk about your project. It’s the “do one thing and do it well” philosophy.

2. Talk it up! Make business cards and keep them with you at all times. We’ve made some of our best contacts at social events, so always have cards in your pocket. It’s an easy transition from the standard question, “What have you been up to lately?” to explaining your project and giving out a card. Also, talk to other groups who have done something similar before! We’ve gotten some really great advice from other nonprofits serving women in need in our area. They can help you avoid pitfalls even before you begin, and are always happy to talk with you.

3. Find a fiscal sponsor. Seek out a registered 501(c)3 nonprofit organization that will allow you to run your funds through their bank account; this will allow you to take tax-deductible donations. Be sure to sign a fiscal sponsorship agreement with them to protect both parties—and also because you’ll need it to apply for most grants. You can find a standard agreement online and customize it to your situation. In addition, if your sponsor is willing, ask them to add a simple DBA (your project name) to their bank account—this will allow you to accept checks made out to your organization. Churches are usually willing to sponsor projects like these, but you can talk with any nonprofit whose work aligns with yours.

4. Set boundaries—so your project doesn’t eat you alive! For example, we don’t deliver.  We have one pick-up location and are happy to make a box of supplies for you to pick up there. Also, we don’t supply to individuals; only organizations. This helps in two ways. One, we’re creating a few big pick-ups instead of several small ones, which is less time-consuming. Two, it protects us from getting too involved with any one individual. That may sound counter to our mission, but it’s sometimes hard to be asked for help in areas that don’t meet your mission, and that’s more likely to happen when you’re dealing with individuals. Remember that it’s okay to say no. Also in the interest of self-protection: delegate. Anyone can count pads and put them in bags, or pick up cupcakes. It doesn’t always have to be you.

5. Make your fundraisers pop. Going back to “do one thing and do it well,” have one big fundraiser each year and really blow it out. These days, almost every day has some sort of designation; for us, the one that fits is Menstrual Hygiene Day, May 28, so we’re throwing a Red Panty Party then! Be creative with your theme so it will be memorable and intriguing. If you’re starting a garden, maybe you could have a juice party on Earth Day or the first day of spring? But it doesn’t have to be a party, of course—there are tons of fundraising ideas on the glorious Internet.

Sister Supply

[Summer Cycle kits packaged and ready to go to school-age Memphis girls in need.  Photo via Sister Supply’s Facebook page.]


Time/timing:

For us, Sister Supply just blew up! It really didn’t take long. We hit Facebook, two days later we had an article in the newspaper, then we got a website… It’s been really amazing. So be prepared: your idea might take off fast.

Our time commitment is cyclical (pun intended?). We give our shelters three-month supplies; when that three-month mark hits, it can get really busy. At our big fundraiser, we give girls ‘summer supply’ bags to take home with them, and those take a while to pack. So just plan ahead and make time at the points in the year that you know you’ll be extra busy.


Budget:

We work on a goal of $10 per woman, per month. When we first raised money on ioby, we wanted to raise $5,100, and we met that goal, but throughout our first year we raised closer to $12,000 total in monetary donations. We’re now applying for grants so we can hire at least a part-time employee. The bigger Sister Supply gets, the more time—and money—it takes!


Additional resources:

There are several other organizations that are working on various levels to de-stigmatize menstruation; they are all good resources:


Nikki and Eli

About the authors:

Nikii Richey is an artist, studio manager, curator, jewelry-maker, part-time church lady and a co-founder of Sister Supply. She lives and plays in Memphis with her husband and two knuckle-head boys.

Sister Supply co-founder Eli Cloud is the Business Development Manager (and Marketing Coordinator, Special Event Coordinator, and Gallery Curator) for ANF Architects. Eli is personally committed to making a difference within her community and believes volunteerism is key to a life well-lived. She lives in Memphis with her husband, Eric; daughter, Lily; and Sausage, the perpetual puppy.
Inspired? Start your own project!

Learn from a Leader: How to Capture and Report Sneckdowns

At ioby, we are  lucky to be surrounded by experts from across the country. Our ioby Leaders  can do some amazing things;  They can  build bat houses, make beeswax candles, teach  kids how to tell stories through dance!  And best of all, they’re not stingy with their knowledge.  That’s why we like to  feature some of our favorite Leaders in our Learn from a Leader series. We hope you enjoy!

Screen Shot 2016-01-20 at 9.09.14 AM

About the Author:  Clarence Eckerson, Jr. of Streetfilms is frequently referred to as “the hardest working man in transportation show biz” for his dedication to making wonky concepts more accessible and entertaining to the public. He’s been documenting transportation advocacy for over ten years with no formal background in video or urban planning. Clarence attributes much of his knowledge to never holding a driver’s license—99% of his footage is shot by bike, foot, train, or bus.


What the heck is a sneckdown?

Sneckdowns (a contraction of “snowy neckdowns” popularized by  Clarence  and Streetsblog founding editor Aaron Naparstek) are leftover snow piles on city streets that can show us spaces where cars don’t drive—spaces that can easily be reclaimed, by sidewalk extensions or other improvements, for pedestrian use.


Screen Shot 2016-01-20 at 9.19.09 AM

1. Gather some info

A few weeks before the first snowfalls hit your area, research and make a list of places that are “overbuilt” for cars: wide expanses of asphalt where it’s dangerous to cross, long straightaways that encourage speeding, or locations where pedestrian fatalities have occurred. This will familiarize you with the kinds of areas that make for good sneckdowns.


2. Secure pals!

Though this project can be easily be done solo, it will be more fun if you identify a few other people interested in safe streets and get them excited about documenting sneckdowns with you.


3. Tune in

Monitor the weather, and when a snow storm approaches, be ready to go into action. Although wet/light snow works okay, what you’re really hoping for is a heaping helping— at least three or four inches.


4. Get snapping

Once there’s snow on the ground, go out and take photos of streets where areas of snow remain largely untouched. Ground-level photos are great, but a second- or third-story perspective can show more (an outdoor subway platform, the window of a department store, etc). Visiting the places on your list in Step 1 is ideal, but be open to improv! Just while you’re going about your day, you’ll see how little room cars use in many intersections.


5. Spread the word

Tweet your photos with a #sneckdown hashtag. Email them to stakeholders: relevant nonprofits, elected officials, the department of transportation. Get local news attention by writing to “breaking news” email addresses and linking to other coverage of the phenomenon. Keep track of your photos on your own blog or Instagram, and post everything on related Facebook accounts (your own, advocacy groups, Streetfilms, etc).


Time/timing: All winter long!

Budget: Close to zero. Just your cell phone or a camera.

Supplies: A cell phone, or a digital camera, and a Twitter account is all you’ll need. Instagram, a blog, or a website is a bonus.


Additional resources:

Original Streetfilms video

The sneckdown origin story

Sweet successes


Beyond sneckdowns:

Other street conditions you can document

ioby’s Guide to Doing Good in the Cold and Snow  [PDF]

Video: Daniel Peterson Paints Memphis Basketball Courts

ioby Leader Daniel Peterson  of Project Backboard is on a mission to re-stripe all 52 of Memphis’ public basketball courts.  A former Division 1 college player,  Daniel remembers the impact basketball had on his life as  a teenager.

“Having our town’s courts renovated when I was in high school really changed the trajectory of my life. If you make even minor improvements that draw people out of their cars and out of the house and into the parks, then you start getting that social interaction that strengthens community ties.”

Daniel is one of our ioby Benefit Superheroes this year. We can’t wait to see him in Brooklyn!

Thanks to Adam Kaufman and David Leonard for the video!

See Daniel’s tips for improving basketball courts in your own neighborhood.


Learn from a Leader: How to Build a Sensory Garden for Everyone

At ioby, we are  lucky to be surrounded by experts from across the country. Our ioby Leaders  can do some amazing things;  They can  build bat houses, make beeswax candles, teach  kids how to tell stories through dance!  And best of all, they’re not stingy with their knowledge.  That’s why we like to  feature some of our favorite  Leaders in our Learn from a Leader series. We hope you enjoy!

This  post comes from   Jamie Young and the other members of the Washington Bottoms Community Garden. The Garden is part of the GrowMemphis network of organic gardens. Based in Midtown Memphis, Washington Bottoms makes all decisions by consensus through their seven-member board. A number of plots in their garden are maintained by their owners, and one is a free-for-all for the community.

Screen Shot 2015-09-15 at 9.54.46 AM

A sensory garden is made to stimulate all five senses, and emphasizes the sounds, sights, smells, tastes, and feels of a garden in an intentional way. While sensory gardens can be especially wonderful for people with sensory impairments, people of all abilities enjoy them. They’re truly gardens for everyone!


Steps:

  1. Start with your budget. It’s pragmatic but important! We got a $2,000 grant to build our garden and planned everything with that in mind. For example, cinder block raised beds fit within our budget, so we used those; lumber would have been more expensive. If you have a $0 budget, you can still build a sensory garden! You’ll just need to plan farther in the future, so you can do things like raise seedlings from an heirloom seedling club instead of buying plants (ask around about the most fragrant varieties).
  1. Get up to code. It’s really important that you collaborate with local advocacy groups to ensure you’re building your garden to accessibility standards. We worked with our local chapter of the disability rights activism group ADAPT to plan the most exciting garden we could. For example, we were concerned about how to account for the “sound” sense, and ADAPT suggested we feature bee- and butterfly-attracting plants so visitors could hear buzzing and fluttering sounds. On another occasion, we got the idea to label our plants with metal tags that could be printed with Braille as well as English. And we made sure our pathways were ADA compliant, and that our raised beds were a few different heights, for kids, adults, and people in wheelchairs. Our contacts at ADAPT weren’t gardeners, but they had a lot of great ideas.
  1. Schedule, schedule, schedule. For your opening day, you want as many plants in bloom as possible, so draft your planting schedule to align with that and any other events you want to hold. Schedule enough workdays for volunteers, too, and make sure you pick the right people for the right jobs. Your engineering-minded friends can help you build cinder block beds, for example; young volunteers make enthusiastic guides, painters, and planters. Attract a wide volunteer base and make them privy to your planning process so they know they’re important.
  1. Let ’em in! Once your garden’s ready, schedule tours of it with local schools and any other groups that might particularly appreciate experiencing plants in a different way. Visitors to our garden always want to see the sensory garden first, because they know we’ve picked exciting things for it that they’ve never seen or heard of before. It’s a show-off garden!
  1. Go beyond gardening. Think of other ways to make your plot a full-on sensory experience: maybe build a playground around the beds with activities that relate to the plants nearby—we have a bamboo xylophone! You can use found objects to build experiential exhibits, too. A garden like this is not just for plants—make it a celebration of the senses in every way.


Time/timing:

We took a month to build our raised beds, working only on weekends. That was about 20 hours for five beds with 36 blocks each, which is a pretty large garden. If you’re planting in-ground, you could do it in one or two weekends, if you have tillers. Your timing within the year depends on whether you’re using seeds or live plants: unless you have a greenhouse, you’ll want to plant seeds in spring; we used mostly short-growing seedlings. We started our garden in March and opened in June (though we’re still working on building up the playground!).


Budget:

$2,000 was plenty for our needs; you could build a small sensory garden with seeds for half that. We bought 25 yards of soil, which was a lot. Again, a smaller garden will cut your costs.


Supplies:

For raised beds, make sure you get string and a level, and possibly rebar to reinforce the corners. You might need sand to help you level the ground (the cinder blocks will settle into it). Other necessities include a wheelbarrow, shovel, and all the regular garden tools.


Additional resources:

  • Kitchen Gardeners International gives grants of up to $500 each year to up to 200 food gardens. They’re also a great source of garden info!
  • ADAPT is one of many local and national advocacy groups that can help you think of solutions to any accessibility questions you encounter—including those that might arise with the owner of your garden’s land.
  • Volunteer possibilities span all ages and abilities: the Eagle Scouts, Sierra Club, and local victory garden associations are all great places to find helping hands, as are homeless shelters and senior groups. Remember who your garden is for!